
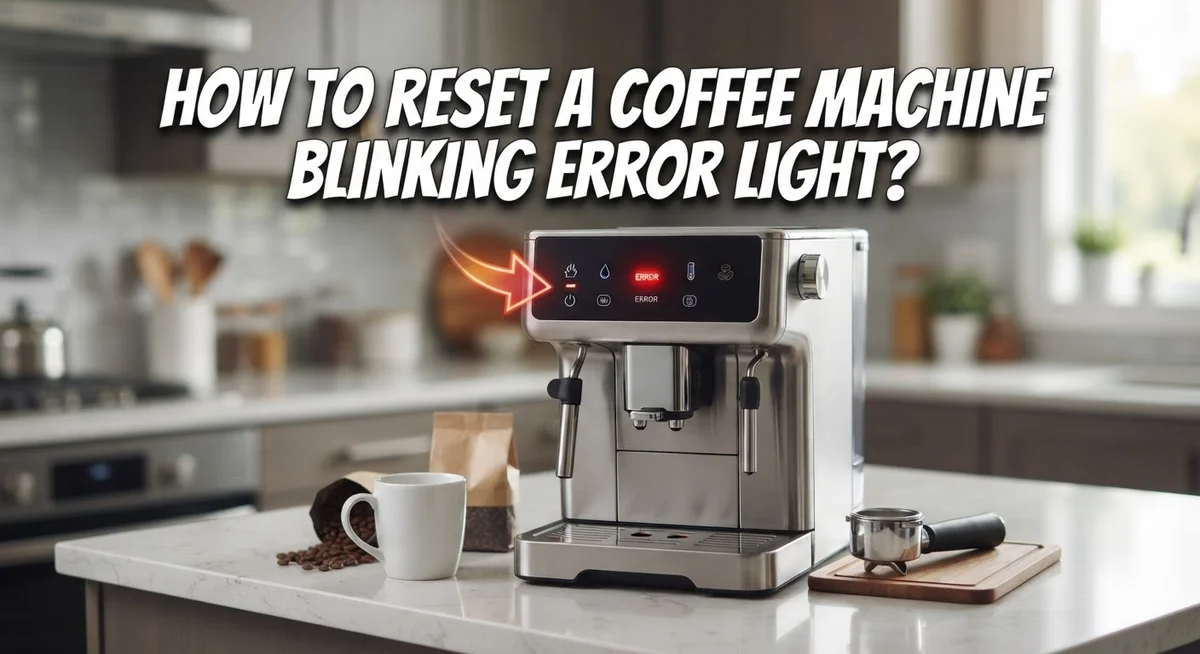
How To Reset A Coffee Machine Blinking Error Light?
Your coffee machine blinks at you and refuses to work. It feels frustrating, especially when you need that morning cup fast.
But don’t worry. A blinking error light does not mean your machine is broken forever.
Most of the time, it points to a small issue. This could be overheating, a water problem, or a capsule reading error.
Some blinking patterns are even normal. For example, rapid blinking on certain models simply means the machine is heating up.
The good news is that fixing this problem is often simple. You don’t need to call a technician or buy a new machine.
In a Nutshell
- Unplug your machine first. Leave it unplugged for 10 to 20 minutes. This lets the internal electronics fully reset.
- Check the water chamber. A low water level often triggers error lights. Fill it up before you try anything else.
- Watch the blinking pattern. Rapid blinking can mean your machine is just heating up. This is normal on many models, so don’t panic right away.
- Try a factory reset if needed. Hold the power button for 7 seconds or more to enter descaling mode. This often clears stubborn errors.
- Clean the needles or brew unit. Trapped coffee grounds can cause capsule reading issues. A quick clean might solve your problem instantly.
- Give it time between steps. Always wait at least 10 seconds between unplugging and reconnecting. Rushing this step can cause the reset to fail.
What Does a Blinking Error Light Mean?
A blinking error light on your coffee machine communicates that something needs your attention. Your machine has built in sensors that detect problems and alert you through these light patterns. Understanding what the light means helps you fix the issue quickly.
Different blinking patterns tell you different stories. Rapid blinking often means your machine is heating up. This is completely normal on many coffee machine models. You do not need to worry or take action when you see this pattern. The machine will stop blinking once it reaches the right temperature.
Patterned blinking with pauses points to actual problems. Two blinks followed by a pause usually signals a water related issue or a capsule detection problem. Your machine cannot read the capsule properly, or it senses that water is not flowing as it should. Three blinks might indicate an overheat situation. Your machine shut itself down to cool and protect its internal parts.
Some machines blink when the water chamber runs low or empty. Others blink when the brew unit needs cleaning. Trapped coffee grounds or mineral buildup can block sensors that read capsules. Your machine detects this blockage and alerts you through blinking.
Pay attention to the blinking speed and pattern. Count the blinks and note any pauses between them. This information helps you pinpoint the exact problem. Write down what you see so you remember the pattern clearly.
The blinking light is actually helpful. It prevents your machine from running with a problem that could cause damage. Your machine protects itself by refusing to work until you address the issue. This means you can trust that the blinking light is telling you something real and fixable.
Most blinking errors respond well to simple troubleshooting steps. You rarely need professional repair for these issues.
Decoding Blink Patterns: Rapid vs. Paused Sequences
Your coffee machine uses blinking patterns as a communication tool. Understanding the difference between rapid and paused sequences helps you know whether you have a real problem or normal operation.
Rapid blinking happens when your machine is heating up. This pattern appears as continuous, fast flashes without obvious pauses. On certain models, rapid blinking during startup is completely normal. Your machine is warming the water to the right temperature. You do not need to do anything. Simply wait a few minutes and the blinking should stop once the machine reaches operating temperature.
Paused sequences tell a different story. These patterns show a blink, then a pause, then another blink or series of blinks. A two blink pattern with a clear pause between them usually signals a water related issue or a capsule detection problem. Three blinks with pauses might indicate a different fault. Pay close attention to how many blinks occur and how long the pause lasts between them.
The key difference is consistency. Rapid blinking stays steady and fast throughout. Patterned blinking has rhythm and spacing. Your machine is literally spelling out an error code through these patterns.
Here is what you should do. First, watch the blinking for 30 seconds. Count the blinks and note any pauses. If the blinking is rapid and continuous, let your machine finish heating. If you see a clear pattern with pauses, move forward with troubleshooting steps.
Check your water chamber next. Low water often triggers patterned error codes. Fill it completely and watch if the blinking changes. Many machines stop blinking once water reaches the proper level.
Understanding these two blinking types prevents unnecessary troubleshooting. You avoid wasting time on a machine that is simply heating up. At the same time, you catch real problems early when they show patterned sequences.
Step-by-Step: How to Power Cycle Your Coffee Machine
A power cycle is the simplest way to reset your coffee machine’s electronics. This process clears temporary errors that cause the blinking light to appear.
Start by unplugging your machine from the wall outlet. Make sure you fully remove the power cord. Do not skip this step, as a partial disconnect may not clear the error.
Wait for 10 to 20 minutes while the machine is unplugged. This waiting period allows the internal circuits to fully discharge. Shorter wait times often fail because the machine still holds residual power. Ten minutes is the bare minimum, but 20 minutes gives better results.
After waiting, plug the machine back into the outlet. Wait at least 10 seconds before pressing the power button. This delay ensures the machine completes its startup sequence properly.
Press the power button once and observe what happens. The blinking light may stop immediately, or the machine may go through a normal startup cycle. Some machines show rapid blinking during the heating phase, which is completely normal.
If the error light returns after power cycling, the problem runs deeper than a simple glitch. In this case, you may need to try a factory reset or clean internal components like the brew needle.
Do not rush between steps. Many people reconnect the machine too quickly and wonder why the error persists. Give each stage time to work properly.
Power cycling works because it forces your machine to restart from scratch. The electronics lose their memory of the error, and the machine begins fresh. This method fixes roughly 60 to 70 percent of blinking light issues without requiring any disassembly or advanced troubleshooting.
How to Perform a Factory Reset on Nespresso and Similar Machines
A factory reset goes deeper than a simple power cycle. This process clears all settings stored in your machine’s memory and returns it to manufacturer defaults.
Start with your machine unplugged. Make sure it has been disconnected for at least 10 to 20 minutes. This step is crucial because it fully drains the internal circuits of residual power.
Plug the machine back in after the waiting period. Now locate your power button. On most Nespresso machines and similar models, you’ll hold this button down continuously.
Press and hold the power button for 7 seconds or longer. You should see the light respond. Some machines enter descaling mode automatically, which is the factory reset state. The light may blink differently or change color during this process.
If your machine has multiple buttons, you might need to press the power button and another button simultaneously. Common combinations include the power button plus the beans button or the power button plus a menu button. Check your machine’s manual for the exact combination if holding the power button alone doesn’t work.
Once you enter factory reset mode, the machine will guide you through a cleaning cycle. Let this cycle complete fully. Do not interrupt it or turn off the machine. This process clears error codes and resets internal sensors.
After the cycle finishes, your machine should return to normal operation. The blinking error light should be gone. If the light returns immediately, the underlying problem may be hardware related rather than a simple software glitch.
Remember that factory resets work best for software errors. Physical problems like clogged water lines or broken sensors require different solutions. If the error persists after a factory reset, you may need professional inspection.
Pre-Reset Checks: Water Levels, Needles, and Brew Unit
Before you attempt any reset, take a few minutes to check the basics. Many blinking errors come from simple issues you can fix immediately.
Start by looking at your water chamber. Open the top and see if water is actually inside. A low or empty water tank triggers blinking lights on most machines. Fill it with fresh, cold water to the maximum line. This single step solves roughly half of all error situations.
Next, inspect the brew needle or puncture pin. This small metal piece sits inside your machine and pierces capsules during brewing. Over time, coffee grounds and mineral buildup stick to it. Gently remove the brew unit if your machine allows it. Rinse the needle under warm water and use a soft brush to clean around it. Make sure nothing blocks the needle’s movement.
Check your brew unit itself while you have it out. This is the chamber where capsules sit during brewing. Look for old coffee residue, dried oils, or mineral deposits inside. Warm water and a soft cloth work well for cleaning. Let all parts dry completely before reassembling.
Examine the water line connections too. Some machines have a tube that delivers water to the brew chamber. Make sure this tube sits firmly in place and shows no cracks. A loose connection causes water detection errors and blinking lights.
After completing these checks, reassemble everything carefully. Make sure the brew unit clicks back into position. Fill the water chamber again.
These pre-reset checks often stop the blinking immediately. If your machine still shows errors after these steps, you have confirmed the problem is not a simple blockage or low water level. You can then move forward with confidence to power cycling or factory reset procedures. Taking five minutes here saves you from unnecessary troubleshooting later.
Common Mistakes That Prevent a Successful Reset
Many people rush through reset attempts and wonder why the error light keeps blinking. Understanding what actually goes wrong helps you fix the problem faster.
The biggest mistake is unplugging your machine for too short a time. Some people unplug it for just 2 to 3 minutes, then plug it right back in. This doesn’t give the internal circuits enough time to fully discharge. You need at least 10 to 20 minutes of complete disconnection. Anything less leaves residual electrical charge in the system.
Another common error is reconnecting too quickly after the wait. People count to 10 and plug the machine back in immediately. This can trigger the same error again because the electronics haven’t fully reset. Wait a full minute after the waiting period ends before plugging back in.
Skipping the water level check is also problematic. Many blinking errors relate to water detection sensors. If your water chamber is empty or low, the machine will keep showing error signals even after you reset it. Always fill the water chamber completely before attempting any reset.
Ignoring the blinking pattern itself causes wasted effort too. Rapid blinking on some machines means normal heating, not an error. But a two blink pattern with pauses usually indicates a real problem. If you don’t recognize the difference, you might reset a machine that doesn’t need resetting.
People also forget to check the brew unit and needles. Debris or mineral buildup can trigger error codes. If you skip this step and jump straight to factory reset, the error will return once you start using the machine again.
The key is patience. Take time to check water levels, inspect components, and wait the full unplugging period. These simple steps prevent most reset failures and save you frustration.
Troubleshooting When the Error Light Won’t Clear
When the error light continues blinking after your initial reset attempts, you need a different approach. The problem usually stems from one of three areas: a sensor malfunction, a deeper software issue, or a component that needs cleaning.
Start by identifying the blinking pattern. Rapid blinking often means the machine is heating normally, but slow, patterned blinking signals a real problem. Two blinks with a pause typically point to water detection issues or capsule reading errors. Understanding this difference saves you time.
If the light still blinks after your power cycle, try a second reset using different button combinations. Some machines respond to holding the power button alone for 10 seconds. Others require pressing the power button and a secondary button at the same time. Check your machine’s manual for the exact combination for your model.
Run a descaling cycle even if you descaled recently. Error lights sometimes persist because mineral buildup blocks internal sensors. The descaling process flushes these sensors and often clears stubborn error codes. Let the machine complete the full cycle without interruption.
Check water line connections carefully. Loose tubing or kinked lines create false water level errors. Inspect where the water tube connects to the reservoir and to the machine itself. Push connections firmly into place.
If blinking continues after these steps, the machine likely has a hardware failure. A sensor may be broken, or the circuit board might need replacement. At this point, contact the manufacturer’s support team with details about the blinking pattern and all reset attempts you’ve made. They can diagnose whether repair or replacement is necessary.
Document what you’ve tried. This information helps support staff understand the issue and provide faster solutions. Patience and systematic troubleshooting prevent unnecessary frustration.
Final Thoughts
A blinking error light feels frustrating. But most of the time, the fix is simple.
Power cycling solves the majority of these issues. Unplug your machine for a full 10 to 20 minutes. This gives the internal electronics enough time to fully reset.
Rushing this step causes most failed attempts. Give your machine the time it needs. Patience makes a real difference here.
Before you reach for a factory reset, always check the basics first. Water levels, needles, and the brew unit deserve your attention. These small checks often clear the problem on their own.
If a simple power cycle does not work, try a factory reset. Hold the power button for at least seven seconds. Your machine will then enter a cleaning or descaling mode.
Remember that not all blinking means trouble. Some machines blink rapidly during normal heating cycles. This is completely normal and nothing to worry about.
The Vertuo Next is a good example of this. Rapid blinking on this model simply means it’s warming up. Slower, patterned blinking usually signals a real problem instead.
If your error light still blinks after trying these steps, do not panic. Go back through each step carefully. Sometimes a second attempt works when the first one does not.
Persistent blinking after multiple attempts may point to a hardware issue. At this point, professional help might be necessary. Contact the manufacturer’s support team for further guidance.
Most coffee machine errors are fixable at home. A little patience and the right steps usually clear things up. Your machine should be back to brewing in no time.
Keep these steps in mind for future reference. Blinking lights will happen again eventually. Now you know exactly what to do when they do.
Frequently Asked Questions
Why is my coffee machine blinking red?
A blinking red light signals an internal issue. Common causes include a full water tank, heating problems, or capsule detection errors. The blinking pattern tells you what’s wrong. Rapid blinking usually means the machine is heating up normally. A two-blink pattern with pauses points to water or capsule issues.
Check your water level first. An empty or overfilled tank causes blinking. Remove any stuck capsules from the brew unit. Clean the needle if debris blocks it.
How long should I unplug my machine to reset it?
Unplug your machine for 10 to 20 minutes minimum. This gives the electronics time to fully discharge and reset. Shorter unplugging times often fail to clear the error.
Wait at least 10 seconds before plugging back in. Reconnecting too quickly prevents a proper reset. After reconnecting, wait 30 seconds before pressing any buttons.
What button combination resets a coffee machine?
Try holding the power button for 7 or more seconds after reconnecting. This enters descaling mode on many models and clears errors.
Some machines respond to pressing the power button and the beans button together. Hold both for 3 to 5 seconds. If one method doesn’t work, try the other after a fresh power cycle.
Should I run a descaling cycle if the light still blinks?
Yes. Run a descaling cycle even if you descaled recently. Mineral buildup inside the machine can trigger error lights.
Follow your machine’s descaling instructions. Use descaling solution or vinegar as appropriate. A full descaling cycle often resolves persistent blinking that simple resets don’t fix.
When should I stop trying to fix it myself?
Stop if the light continues blinking after two power cycles and a descaling attempt. Document everything you’ve tried.
A hardware failure requires professional service. Contact the manufacturer or a repair specialist at this point.

Hi, I’m Emma Lee — the coffee-obsessed creator behind Morning Drip Vault. I spend my days testing coffee machines, exploring brewing techniques, and reviewing the latest coffee gear. My mission is simple: helping you find the perfect machine to brew your best cup, every single morning.