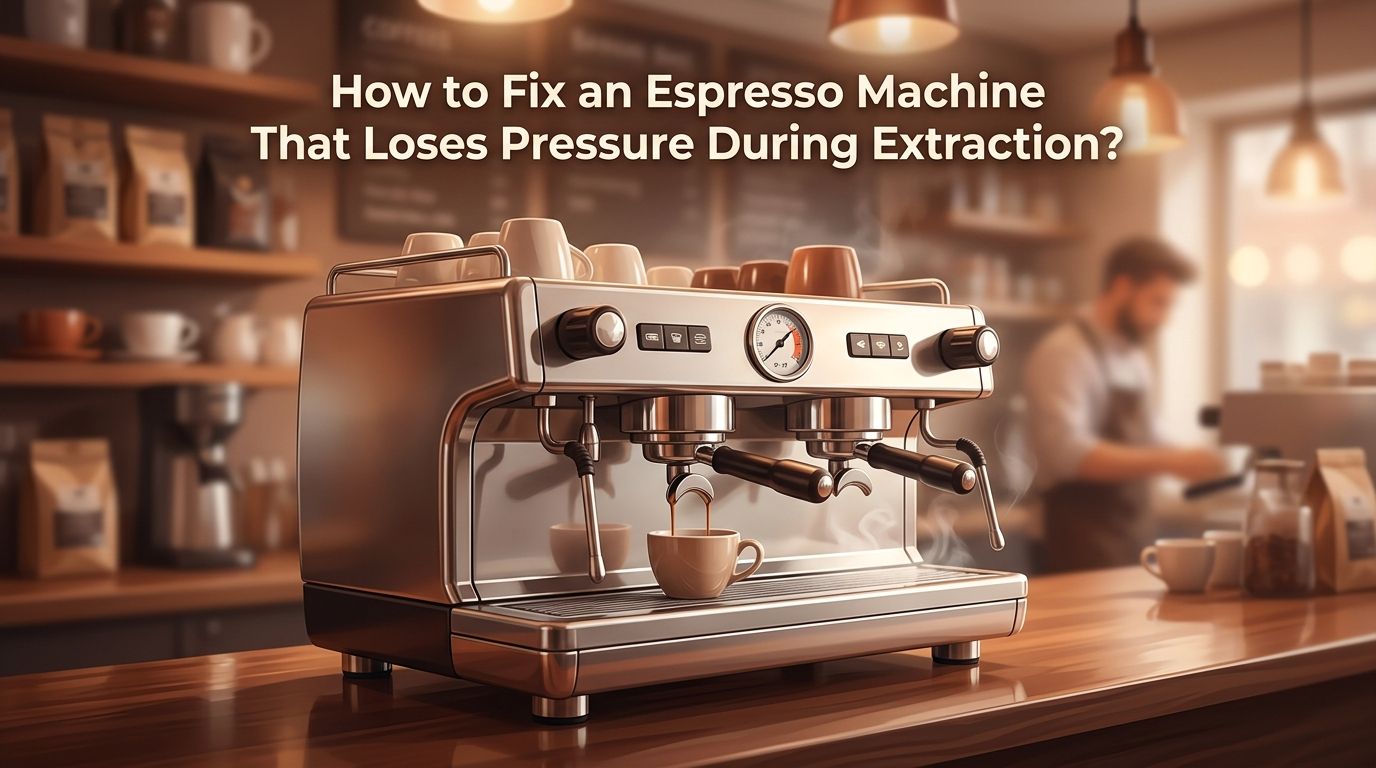
How to Fix an Espresso Machine That Loses Pressure During Extraction?
You pull a shot, the gauge starts strong, and then the pressure drops mid extraction. The espresso pours thin, the crema disappears, and you are left with a weak, sour cup.
Sound familiar? Pressure loss during extraction is one of the most common espresso machine problems, and it affects home baristas and coffee shop owners alike.
The good news is that most pressure issues have clear, fixable causes. A clogged group head, worn gaskets, scale buildup, or a failing pump can all trigger this problem. Some fixes take five minutes. Others may require a deeper inspection.
In a Nutshell
- Pressure loss during extraction usually comes from a specific, identifiable cause. The most common culprits are clogged group heads, worn gaskets, mineral scale buildup, a failing pump, or poor puck preparation. You rarely need to guess because each cause produces distinct symptoms you can observe during brewing.
- Start with the simplest fixes first. Clean your group head and filter basket, check your grind size, and inspect the portafilter gasket before you consider replacing internal parts. Many pressure problems resolve with basic cleaning and maintenance that costs nothing.
- Descaling your machine on a regular schedule prevents a large number of pressure problems. Hard water deposits build up inside boilers, valves, and water lines over time. This silently reduces flow and strains the pump long before you notice a drop in extraction quality.
- Your puck preparation directly affects pressure stability. An uneven coffee bed, incorrect dose, or inconsistent tamp creates channels in the puck. Water rushes through these weak spots instead of flowing evenly, causing a rapid pressure drop during the shot.
- Worn seals and gaskets are a hidden cause of pressure loss. The rubber gasket between the group head and portafilter degrades with heat and use. A compromised seal lets water escape instead of building full pressure through the coffee puck.
- Know when to call a professional. If cleaning, descaling, and gasket replacement do not fix the issue, the pump, solenoid valve, or pressure regulator may need repair. Continuing to use a machine with internal mechanical failures can cause further damage.
Understanding How Espresso Pressure Works
Espresso machines use a pump to force hot water through finely ground coffee at approximately 9 bars of pressure. This pressure is what extracts the oils, sugars, and aromatic compounds that give espresso its rich flavor and thick crema.
The pump pushes water through the boiler, into the group head, and through the compressed coffee puck in the portafilter. Every component in this path must be sealed, clean, and functioning correctly. A failure at any point in this chain causes pressure to drop.
Gradual pressure loss usually points to scale buildup or slowly degrading seals. Sudden pressure drops often indicate a pump malfunction, stuck valve, or major internal leak. Recognizing the speed of the decline helps you narrow down the cause quickly.
Check Your Grind Size and Dose
Before you open up the machine, check your coffee first. Grind size is the single biggest variable that affects extraction pressure on the user side. If your grind is too coarse, water flows through the puck with little resistance, and the machine cannot build enough pressure.
Try grinding finer in small increments. A proper espresso grind should feel like fine sand between your fingers. Also check your dose. Most standard double baskets require 18 to 20 grams of ground coffee. An underdosed basket creates empty space that lets water pass too freely.
Pros: This fix costs nothing and takes under a minute. It resolves pressure issues caused by beans, grind settings, or dose errors.
Cons: It only works if the problem is user related. If your grind is already correct and pressure still drops, the issue is mechanical.
Improve Your Puck Preparation
Even with the right grind size, poor puck preparation causes channeling, which leads to rapid pressure loss. Channeling happens when water finds weak spots in the coffee bed and rushes through them instead of flowing evenly through the entire puck.
Use a Weiss Distribution Technique (WDT) tool to stir and distribute grounds evenly in the basket before tamping. Then tamp with consistent, level pressure. An uneven tamp creates a lopsided puck that channels on one side.
A bottomless portafilter helps you spot channeling. If you see uneven streams or spraying during extraction, your puck prep needs work. Proper distribution and tamping create a uniform bed that maintains steady back pressure throughout the shot.
Pros: Dramatically improves shot consistency and pressure stability. Low cost solution using simple tools.
Cons: Requires practice and patience. Results vary with different beans and roast levels.
Clean the Group Head and Filter Basket
Coffee oils and fine grounds accumulate inside the group head and filter basket after every shot. Over time, this residue hardens and restricts water flow, reducing the pressure that reaches the coffee puck.
Remove the filter basket from the portafilter and soak it in hot water mixed with espresso machine cleaner. Use a small brush to scrub the inside of the group head, paying attention to the shower screen and dispersion plate. These components distribute water evenly across the puck, and blockages here cause uneven flow and pressure drops.
For machines with a three way solenoid valve, backflushing is essential. Insert a blind filter or backflush disc into the portafilter. Add half a teaspoon of espresso cleaning powder. Run the brew cycle for 10 seconds, stop, and repeat 5 to 8 times. This forces cleaning solution back through the internal valve pathway and clears buildup.
Pros: Restores water flow and pressure in many cases. Easy to do at home with basic supplies.
Cons: Does not fix mechanical failures. Backflushing only works on machines equipped with a three way valve.
Inspect and Replace the Group Head Gasket
The group head gasket is a rubber or silicone ring that creates a pressure tight seal between the portafilter and the group head. Heat and repeated use cause this gasket to shrink, harden, and crack over time.
A worn gasket allows water to leak around the portafilter instead of pushing through the coffee puck. You may notice water dripping from the edges of the portafilter during extraction, or the handle may feel loose and easy to lock in.
To replace it, remove the shower screen screws and pry out the old gasket with a flat tool. Press the new gasket into the groove and reinstall the screen. After replacement, lock the portafilter in firmly and run a test shot. The seal should feel tight and produce no visible leaks.
Pros: Inexpensive fix that restores a solid seal. Gaskets typically cost just a few dollars and are widely available.
Cons: Requires basic disassembly. Using the wrong gasket size or material can create new sealing problems.
Descale the Machine to Remove Mineral Buildup
Hard water contains calcium and magnesium that deposit inside the boiler, pump, and water lines. This mineral scale narrows internal pathways and reduces water flow, forcing the pump to work harder to maintain pressure.
Signs of scale buildup include slower brew times, reduced steam power, and a gradual decline in extraction pressure. The buildup happens inside the machine where you cannot see it, so it often goes unnoticed until performance suffers.
To descale, fill the water tank with a manufacturer approved descaling solution diluted in fresh water. Run the solution through the brew head and steam wand according to your machine’s instructions. Then flush the system with two to three full tanks of clean water.
Pros: Removes internal deposits and restores flow and pressure. Extends the life of the pump and boiler.
Cons: Takes 20 to 40 minutes to complete. Using the wrong descaler can damage aluminum boilers or internal coatings.
Test for Air Leaks in the System
Air entering the brewing system disrupts pressure stability and causes sputtering, inconsistent flow, and weak extraction. Air leaks are tricky because they are not always visible and may appear intermittently.
Common entry points for air include loose water line fittings, cracked hoses, and worn seals around the pump or boiler. If your machine makes gurgling sounds during extraction or the pressure gauge fluctuates wildly, an air leak is a strong possibility.
Start by checking all visible hose connections and tightening any loose fittings. Inspect silicone and rubber hoses for cracks or brittleness. If the water reservoir sits externally, make sure the intake line is fully submerged and the seal is tight.
Pros: Fixing a leak can immediately restore stable pressure. Many leaks are at accessible connection points.
Cons: Internal leaks may require partial disassembly to locate. Some leaks only appear under operating temperature and pressure, making them hard to find when the machine is cold.
Evaluate the Pump Performance
The pump is the engine of your espresso machine’s pressure system. Vibratory pumps, found in most home machines, have a typical lifespan of 5 to 7 years with regular use. Rotary pumps in commercial machines last longer but still wear down over time.
A failing pump may produce unusual buzzing or humming sounds. You might see the pressure gauge struggle to reach 9 bars, or the needle may climb slowly and then drop during extraction. These symptoms indicate the pump can no longer generate sufficient force.
You can test pump output by removing the portafilter and running the machine into a measuring cup. A healthy pump should produce roughly 200 to 250 ml of water per 30 seconds at full pressure. If output is significantly lower, the pump may need cleaning, repair, or replacement.
Pros: Identifying a pump issue prevents you from wasting time on other fixes. Replacement pumps are available for most popular machines.
Cons: Pump replacement requires opening the machine and working with electrical connections. It is best done by someone with technical experience.
Check the Solenoid Valve
The solenoid valve controls water flow between the pump and the group head. It opens during brewing and closes when the shot ends, releasing residual pressure from the puck. A stuck or partially blocked solenoid valve can prevent full pressure from reaching the coffee.
Symptoms of a faulty solenoid include water continuing to drip after the shot stops, no water reaching the group head at all, or inconsistent pressure readings. Mineral buildup and coffee residue are the most common causes of solenoid malfunction.
Regular backflushing helps keep the solenoid clear. If backflushing does not resolve the issue, the valve may need to be removed, cleaned manually, or replaced. This is a more advanced repair that involves disconnecting wires and water lines.
Pros: A clean solenoid restores proper flow control and consistent pressure delivery.
Cons: Solenoid replacement is a technical repair. Incorrect reassembly can cause leaks or electrical issues.
Inspect the Pressure Relief Valve
The pressure relief valve (also called the over pressure valve or OPV) limits maximum brewing pressure. It opens to release excess pressure when the pump produces more than the set limit, usually around 9 to 10 bars.
If this valve gets stuck in a partially open position, pressure bleeds off during extraction instead of holding steady through the coffee puck. The result is a shot that starts well but loses pressure rapidly. A stuck closed valve, on the other hand, can cause dangerously high pressure.
Some machines allow you to adjust the OPV with a simple screw or spring swap. Others require disassembly to access the valve. Testing the OPV involves running the machine with a blind filter and reading the gauge. The pressure should hold at the set limit without fluctuating.
Pros: Adjusting or replacing the OPV is a targeted fix that directly controls brew pressure.
Cons: Not all machines have a user accessible OPV. Incorrect adjustment can lead to over pressurized brewing or pump damage.
Establish a Preventive Maintenance Routine
Consistent maintenance prevents most pressure problems before they start. A simple daily, weekly, and monthly routine keeps every component in the pressure chain clean and functional.
Daily: Wipe the group head and portafilter after each session. Purge the group head with a short burst of water before and after pulling shots.
Weekly: Backflush with espresso machine cleaner if your machine has a three way valve. Soak the filter basket and shower screen in cleaning solution.
Monthly: Inspect the group head gasket for hardness or cracking. Check hose connections for tightness. Clean the drip tray and water reservoir thoroughly.
Every 2 to 3 months: Descale the machine based on your water hardness. Replace the water filter if your machine uses one.
This routine adds just a few minutes to your day and significantly extends the time between major repairs.
When to Call a Professional Technician
Some pressure problems go beyond what you can fix at home. If you have cleaned the group head, replaced the gasket, descaled the system, checked puck preparation, and the pressure still drops during extraction, the issue likely involves an internal component.
Pump failure, solenoid malfunction, cracked boiler fittings, and faulty pressure regulators all require specialized tools and experience to diagnose and repair. Continuing to brew with these problems can cause secondary damage that increases repair costs.
A qualified technician uses pressure gauges, flow meters, and leak detection tools to pinpoint the exact failure. They can test individual components under operating conditions and ensure the machine is properly calibrated before returning it.
Do not attempt to repair electrical or high pressure components without proper knowledge. Water and electricity create serious safety risks inside espresso machines.
Frequently Asked Questions
Why does my espresso machine start at 9 bars but drop during extraction?
This usually happens because of channeling in the coffee puck, a partially blocked group head, or a worn gasket that cannot hold the seal under sustained pressure. Start by improving your puck preparation and cleaning the group head. If the problem continues, inspect the gasket and solenoid valve.
How often should I descale my espresso machine?
Descaling frequency depends on your water hardness. If you use hard tap water, descale every 4 to 8 weeks. With filtered or soft water, every 2 to 3 months is usually enough. Some machines have a built in descale alert that tracks water usage and reminds you automatically.
Can stale coffee beans cause pressure loss?
Yes. Stale beans produce less CO2, which means less resistance in the puck during extraction. Fresh beans (7 to 21 days after roasting) expand slightly and create a denser puck that holds pressure better. If your beans are several weeks old, try a fresh bag and see if pressure improves.
Is it normal for pressure to fluctuate slightly during a shot?
Small fluctuations of about 0.5 to 1 bar are normal, especially at the beginning of extraction during pre infusion. However, a steady decline from 9 bars down to 4 or 5 bars during a single shot is not normal and indicates a problem with the machine or puck.
How do I know if my espresso machine pump is failing?
Common signs include loud buzzing, slow pressure buildup, the gauge failing to reach 9 bars, and low water output when the portafilter is removed. If the pump produces significantly less than 200 ml in 30 seconds during an open flow test, it is likely worn and needs attention.
Can I fix pressure problems myself, or do I need a technician?
Many pressure issues are fixable at home. Cleaning, descaling, gasket replacement, and puck preparation adjustments solve the majority of cases. If those steps do not work, or if the problem involves the pump, solenoid, or internal valves, a trained technician is the safest and most effective option.

Hi, I’m Emma Lee — the coffee-obsessed creator behind Morning Drip Vault. I spend my days testing coffee machines, exploring brewing techniques, and reviewing the latest coffee gear. My mission is simple: helping you find the perfect machine to brew your best cup, every single morning.