How to Fix a Leaking Portafilter Gasket on a Manual Espresso Machine?
A leaking portafilter can ruin a good espresso shot fast. Water sprays from the group head, pressure drops, and the counter gets messy. The good news is that this problem is often simple to fix.
In many cases, the real cause is a dirty, worn, or badly fitted gasket. A few careful checks can tell you what is wrong. Then you can clean the area, replace the seal, and get back to smooth extractions.
This guide shows you the full process in clear steps. You will learn what to inspect, what tools to use, how to fit a new gasket, and what to do if the leak stays. If your machine leaks around the portafilter, this post will help you solve it with simple and practical action.
In a Nutshell
- Most portafilter leaks start at the seal. The gasket sits inside the group head and helps hold pressure during brewing. Heat, coffee oils, and daily use slowly wear it out. A new gasket often solves the issue, but dirt on the rim, a dented basket, or weak portafilter locking can also cause the same leak. That is why a quick check first is smart and saves time.
- A few warning signs usually appear early. If you need to turn the portafilter much farther than before, if water leaks over the top during extraction, or if the gasket feels hard or looks flat, the seal is likely near the end of its life. Many home users should inspect the gasket every six months and expect replacement about once a year or every one to two years, based on use.
- Cleaning can fix a minor leak. Grounds trapped on the basket rim or under the gasket can break the seal. Rinsing the basket, brushing the gasket area, and running hot water through the locked in portafilter without coffee can help. Pros: quick, cheap, and easy. Cons: it will not fix a cracked or hardened gasket.
- Replacement is usually a beginner friendly repair. Most manual espresso machines let you remove the shower screen, pull out the old gasket, clean the groove, and press in a new one. The job is slow, but it is not hard if you let the machine cool first and work gently.
- The right gasket material matters. Rubber gaskets are common and usually cost less. Silicone gaskets stay softer longer and are easier to clean. Pros of silicone: long life and easier removal later. Cons: the fit can feel different, and the portafilter may turn farther than you expect.
- Good care helps the new gasket last longer. Rinse the basket and portafilter after use, flush the group head, brush away grounds, and backflush only if your machine supports it. Small habits protect the seal, keep pressure steady, and help every shot taste better. That is the real win.
What Causes a Portafilter Gasket Leak
A portafilter gasket leak happens when the seal between the basket rim and the group head fails. During brewing, the machine builds pressure. If the gasket cannot hold that pressure, water escapes around the portafilter.
The most common cause is simple wear. Heat dries the gasket over time. Coffee oils and constant locking also flatten it. A hard or flat gasket cannot grip the basket rim well. That leads to drips, sprays, or a ring of water around the portafilter.
A leak can also happen even if the gasket is still usable. Coffee grounds on the basket edge, old residue in the groove, or a portafilter that is not locked firmly can all break the seal. This is important because many people replace parts too soon.
A new machine can leak too. Some guides note that a fresh gasket may feel tight and need a firmer lock. Pros of checking technique first: free and fast. Cons: it will not solve real wear or a damaged part.
Signs Your Gasket Is Worn Out
A worn gasket gives clear signals if you know what to watch for. One of the biggest clues is handle position. If the portafilter now turns much farther than it used to, the gasket may have compressed too much.
Another clear sign is water leaking over the top of the portafilter during extraction. You may also see a slow drip at first, then a stronger leak as the shot builds pressure. That pattern often points to a weak seal.
Look at the gasket itself if you can. A healthy gasket should feel flexible. A worn one may feel hard, dry, cracked, or flat. Sometimes it looks dark and dirty, but the bigger issue is the loss of softness. That loss of give matters more than color.
Taste can change too. Low pressure can lead to weak shots and messy flow. Pros of spotting the problem early: easier repair and less mess. Cons of waiting: poor espresso, extra strain on the portafilter fit, and more cleanup.
Quick Checks Before You Replace Anything
Before you remove the old gasket, do a few fast checks. Start with the basket rim and the group head. Even a small ring of coffee grounds can stop the seal from closing fully. Wipe both areas clean.
Next, lock in the portafilter without coffee and run water through the machine. Many manuals suggest this simple rinse step because it helps clear loose residue from the basket and portafilter. If the leak gets better, the problem may be dirt, not damage.
Check the basket edge for dents. This part hits the knock box often, so it can bend with use. A dented rim will not press evenly against the gasket. Also inspect the portafilter ears. If they are badly worn, the fit may be weak even with a new seal.
Finally, think about your dose and grind. If the basket is badly overfilled, the puck can push back and add stress during brewing. Pros of this check first: no parts needed. Cons: it takes patience, and it may still end in a gasket replacement.
Tools and Parts You Need for the Job
Most gasket jobs need only a few basic tools. You usually need a flat screwdriver to remove the shower screen screw, a clean cloth, a group brush or small nylon brush, and a blunt pick or gasket pick to pull out the old seal.
You also need the correct replacement gasket for your exact machine. Size and thickness matter. If the wrong gasket goes in, the portafilter may lock too loosely or too tightly. Check your machine manual or parts list before you buy anything.
Some machines benefit from a tiny amount of food safe silicone grease on the top side of a rubber gasket. This can help with seating on certain models. Do not use random grease from the garage or kitchen. Use only a product that is safe for espresso equipment.
Keep a towel nearby because old gaskets can break into pieces. Pros of gathering everything first: smoother repair and less stress. Cons: you may need to pause if your machine uses a less common gasket shape or screen layout.
Safety Steps Before Opening the Group Head
Safety comes first, even for a small repair. Turn the machine off, unplug it, and let it cool fully. The group head stays hot long after brewing stops. Touching it too soon can burn your fingers.
A full cool down also makes the gasket easier to handle. A hot rubber gasket feels softer, but the metal around it is still dangerous. On many machines, waiting about two hours is a safe choice. If the group head still feels warm, wait longer.
Remove the portafilter and empty the drip tray so your work area stays clear. Place the machine where you have good light. A bright view helps you see the gasket groove and any leftover bits from the old seal.
Do not force screws while the machine is hot. Do not use sharp metal picks carelessly near soft metal surfaces. Pros of slow prep: safer hands and cleaner work. Cons: the job takes longer, but the extra time is worth it.
How to Remove the Old Gasket Without Damage
Start by removing the shower screen if your machine design requires it. Most manual machines use a center screw. Once the screen is out, you can see the gasket more clearly and get better access to the groove.
Use a gasket pick or a dull tool to hook the edge of the gasket. Pull slowly. Older gaskets often crack because they have become dry and stiff. If that happens, keep working around the circle until every piece comes out.
Avoid jamming a sharp screwdriver into the group head wall. That can scratch the metal and make future sealing harder. A slow pull is better than a hard pry. Gentle work protects the sealing surface.
If the gasket refuses to move, check for a second access point around the ring. Some people use the basket rim to help seat or loosen parts, but use care. Pros of careful removal: less risk of scratches. Cons: brittle gaskets can come out in small pieces and test your patience.
How to Clean the Group Head and Sealing Groove
Once the old gasket is out, clean the groove well. This step matters more than many people think. Tiny bits of old rubber, baked coffee oils, and packed grounds can stop the new gasket from sitting flat.
Use a microfiber cloth or soft brush to wipe the groove. If the area is very dirty, brush gently until the metal feels smooth. You can also clean the shower screen and screw before they go back in. A clean group head helps the gasket sit evenly.
This is also a good time to brush the area around the gasket seat as part of normal care. Many repair and maintenance guides suggest routine brushing and regular inspection because this small area collects a lot of residue. Clean metal seals better than dirty metal.
Pros of deep cleaning: better fit, lower leak risk, and better flavor. Cons: if you rush, you may miss a small old fragment. That tiny piece is enough to cause another leak.
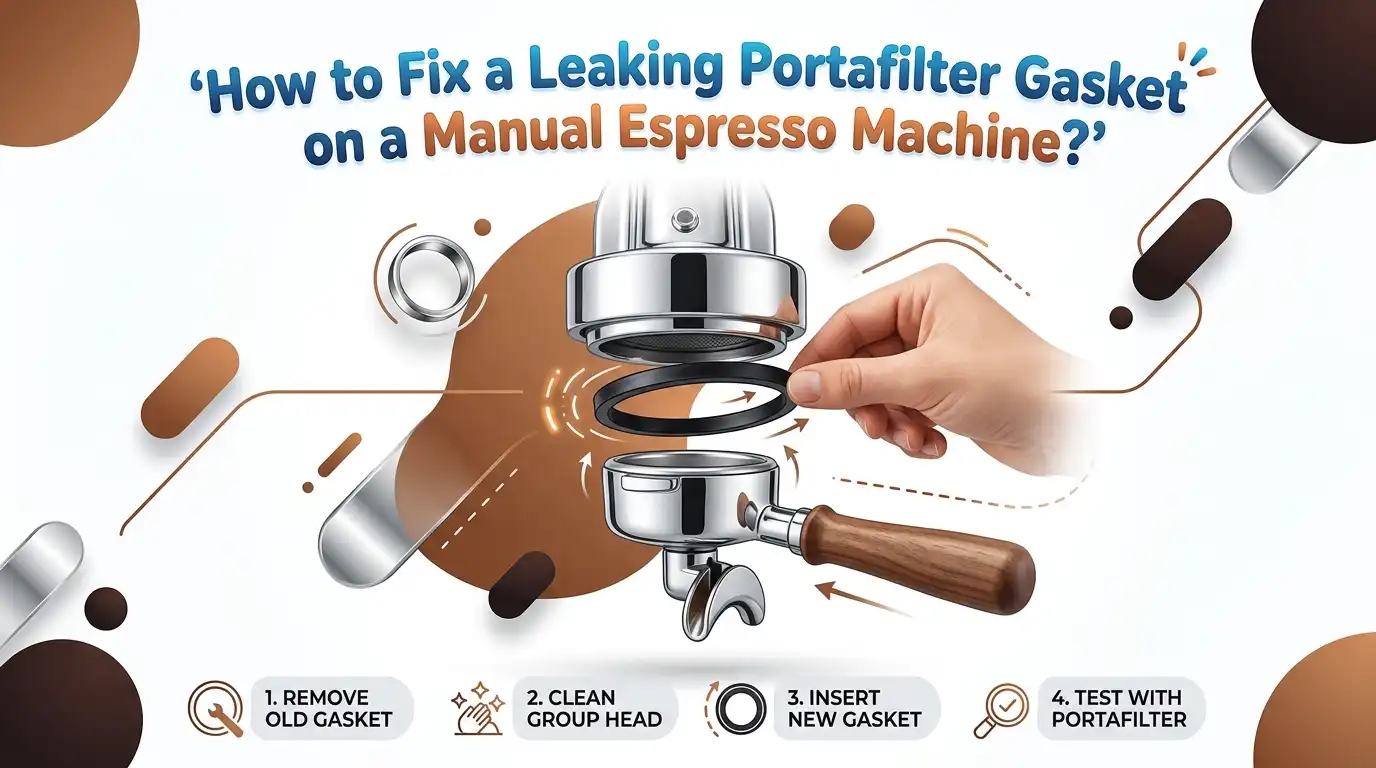
How to Install the New Gasket the Right Way
Take a close look at the new gasket before you install it. Some gaskets have a flat side and a beveled side. On many machines, the flat side faces up into the machine and the beveled side faces down toward the portafilter. Always confirm the correct direction for your model.
Press the gasket into the groove with your fingers first. Then use the back of a pick or another blunt tool to push it in evenly around the circle. Do not force one side all the way in before the rest. Work bit by bit.
If your machine manual suggests a light coat of food safe silicone grease for a rubber gasket, apply only a very thin film on the correct side. Too much grease can attract dirt. Silicone gaskets often do not need it.
After the gasket is mostly seated, insert the portafilter a few times to help press it into place. Pros of correct installation: strong seal and smooth locking. Cons of a rushed fit: leaks, twisted seating, and wasted time.
How to Test the Seal After the Repair
Testing is simple, but it should be done in steps. First, lock in the empty portafilter and run water through the group. Watch the top edge closely. There should be no spray and no drip from the seal area.
Next, check the handle position. The portafilter should feel snug. It does not need to stop at one exact clock point on every machine, but it should not spin too far with no resistance. A fresh gasket may feel tighter at first, and that is normal.
Then pull a real shot. Use a normal dose and grind, not an extreme one. If the machine stays dry around the seal, the repair worked. If you see a few drops only at the start, check that the gasket is fully seated and the basket rim is clean.
Pros of step by step testing: easier diagnosis and less wasted coffee. Cons: it takes a few extra minutes. Still, those minutes can show whether the leak is fixed or hiding.
What to Do If the Machine Still Leaks
If the machine still leaks after a new gasket, do not panic. The next suspect is often the basket or portafilter. The basket rim must be smooth because it seals directly against the gasket. A bent rim can defeat a brand new seal.
Check the portafilter ears too. If they are worn down, the handle may not press the basket high enough into the gasket. On older machines, this is a real cause of repeat leaks. Also confirm that the gasket is the correct thickness and size for your model.
Review your puck prep. An overfilled basket, a puck that touches the shower screen too hard, or a very restricted shot can raise stress at the seal. That does not always cause the leak, but it can expose a weak fit.
If all parts look right and the leak stays, you may need a deeper inspection of the group head or a technician visit. Pros of methodical troubleshooting: you fix the real cause. Cons: it can take more time than a quick parts swap.
Rubber or Silicone: Which Gasket Should You Choose
Rubber gaskets are common, easy to find, and often cost less. They usually give a familiar feel when you lock in the portafilter. If your machine came with rubber, sticking with the same material can keep the fit predictable.
Silicone gaskets have become popular because they stay softer longer. They also tend to resist drying better and can be easier to remove during the next service. Some users find them easier to keep clean because oils and grounds do not stick as much.
There are tradeoffs. A silicone gasket may let the portafilter turn farther than you expect. That is not always a problem, but the feel can be different. Some people like that softer seal. Others prefer the firmer feel of rubber.
Pros of rubber: lower cost, familiar lock, and wide availability. Cons: can dry and harden sooner. Pros of silicone: longer life and easier cleaning. Cons: different fit feel and sometimes higher cost.
How to Stop Future Leaks with Simple Daily Care
A new gasket lasts longer if you keep the group head clean. After brewing, rinse the basket and portafilter under hot water. This helps remove coffee oils before they build up on the sealing surfaces.
Run hot water through the machine with the portafilter and basket in place, but without coffee, from time to time. This simple rinse helps clear residue. Brush around the gasket area often so loose grounds do not get baked into the groove.
Inspect the gasket every six months. Look for cracks, flattening, or a hard feel. Many home users replace the gasket about once a year or every one to two years, depending on how often they brew. If your machine supports backflush cleaning, use that routine as the maker recommends.
Pros of daily care: fewer leaks, better taste, and easier repairs later. Cons: you must stay consistent. Still, two minutes of care is far easier than chasing leaks during your morning espresso.
FAQs
Why does my portafilter leak only at the start of the shot?
This often means the seal is close to failing but has not failed fully. The first burst of pressure finds a weak spot, then the basket settles and the drip slows. Check for grounds on the rim, a partly seated gasket, or a basket that is bent. If the handle also turns farther than usual, the gasket is likely worn.
How often should I replace a portafilter gasket on a home espresso machine?
A good rule is to inspect it every six months. Many home users replace it about once a year, while some light users may get one to two years. Heavy daily use, high heat, and weak cleaning habits can shorten its life. If you see leaks, cracks, or a hard feel, replace it sooner.
Can I fix the leak by tightening the portafilter harder?
Sometimes yes, but only in a limited way. A new or fresh gasket may need a firm lock. If the machine is new, a slightly stronger twist can solve a small leak. Still, if you must force it every time, the gasket, basket, or portafilter fit likely needs attention. More force is not a long term fix.
Is cleaning enough, or do I need a new gasket?
Cleaning is enough if the leak comes from coffee grounds, old oils, or light residue on the basket rim or gasket area. It is not enough if the gasket is cracked, flat, dry, or hard. Start with cleaning because it is easy and free. If the leak stays, move to replacement.
Can a dented basket really cause a gasket leak?
Yes. The basket rim is the surface that presses against the gasket. If that rim is dented from repeated knocking, water can slip through the gap during extraction. This is a common problem on older setups. If a new gasket does not fix the leak, check the basket edge very closely under good light.

Hi, I’m Emma Lee — the coffee-obsessed creator behind Morning Drip Vault. I spend my days testing coffee machines, exploring brewing techniques, and reviewing the latest coffee gear. My mission is simple: helping you find the perfect machine to brew your best cup, every single morning.