How To Unclog A Coffee Machine Water Line?
Does your coffee taste off lately? Does your machine drip slower than usual? A clogged water line might be the reason.
Over time, mineral buildup and biofilm sneak into your coffee maker’s tubes. This blocks water flow and messes with your brew. Your morning cup deserves better than that.
The good news? You don’t need fancy tools or harsh chemicals to fix this. A simple vinegar solution and a bit of patience can clear most clogs right up.
In this guide, we’ll walk you through the whole process. You’ll learn why clogs happen in the first place. We’ll cover mineral deposits, hardened residue, and biofilm buildup.
In a Nutshell
- Unplug your machine first. Safety comes before any cleaning task. Never skip this step.
- Mix a vinegar solution. Combine white vinegar and water at a 50/50 ratio. This mix breaks down mineral buildup safely.
- Spray water forcefully into the fill area. This clears pipes leading to the heating element. It pushes out loose debris fast.
- Use a thin brush or pipe cleaner. Gently scrub inside the tubes to remove hardened residue. This targets spots water alone can’t reach.
- Avoid harsh chemicals like bleach, ammonia, or oven cleaner. These can damage your machine’s parts. Stick to vinegar for safe results.
- Clean regularly to prevent biofilm. Rinse your water tank and tubes often. This stops buildup before it starts.
What Causes Water Line Clogs in Coffee Machines
Water line clogs happen for specific reasons. Understanding what causes them helps you prevent future problems and fix existing ones faster.
Mineral buildup is the main culprit. When water heats inside your machine, minerals like calcium and magnesium leave behind deposits. These deposits stick to the inside of tubes and pipes over time. Hard water areas experience this problem more often than soft water areas.
Biofilm forms when bacteria and mold grow in your water tank and lines. This slimy layer builds up gradually. You won’t see it at first, but it blocks water flow. Biofilm thrives in warm, damp environments inside your coffee maker.
Hardened residue accumulates from old water and coffee oils. When water sits in tubes without moving, it dries and hardens. Coffee particles and oils mix with mineral deposits to create stubborn blockages. These blockages restrict water flow to your heating element and brew basket.
Neglected cleaning speeds up all these problems. If you skip regular maintenance, clogs develop faster. Water that sits in your tank for days becomes a breeding ground for bacteria and mineral deposits.
Poor water quality makes clogs worse. Tap water contains dissolved minerals. Using filtered or distilled water reduces mineral buildup, but even clean water leaves some residue behind.
The combination of these factors creates the perfect storm for clogs. Your machine works harder to push water through blocked lines. This causes slower brewing, weak coffee, or no water flow at all. Regular cleaning prevents all these issues from starting. Simple maintenance keeps your machine running smoothly and your coffee tasting fresh.
Signs Your Coffee Machine Water Line Is Clogged
Your coffee machine sends you signals when something’s wrong inside. Learning to spot these signs helps you act fast before the problem gets worse.
Slow brewing speed is the first warning sign. Your machine usually fills your cup in minutes, but now it takes much longer. Water struggles to push through the clogged tubes, so the flow slows down dramatically.
Weak coffee taste tells you minerals are blocking the water line. When water can’t reach the heating element properly, it doesn’t brew at the right temperature. Your coffee ends up bland and disappointing instead of rich and flavorful.
No water output means the clog is severe. You press the brew button, but nothing happens. Water simply won’t flow through the blocked pipes to your cup.
Unusual sounds from your machine indicate trouble brewing. You might hear gurgling, sputtering, or hissing noises. These sounds mean air is trapped in the lines because water can’t move freely.
Leaking from the bottom or sides suggests internal blockages. When water can’t go where it should, it finds other paths and drips out unexpectedly.
Strange smells coming from your machine point to biofilm growth inside the tubes. This bacterial buildup creates unpleasant odors that coffee can’t mask.
Visible residue in your water tank shows mineral deposits are accumulating. You might see white, brown, or yellowish buildup on the tank walls and tubes.
Pay attention to these signs. They tell you exactly when your water line needs cleaning. Don’t wait until your machine stops working completely. Address these issues early to keep your coffee maker functioning properly and your morning brew tasting fresh.
Tools and Supplies You’ll Need
Before you start unclogging your coffee machine, gather the right items. Having everything ready makes the job faster and easier.
White vinegar is your main cleaning agent. It breaks down mineral deposits and kills bacteria safely. You’ll need a bottle on hand for mixing your cleaning solution.
Distilled water works better than tap water for rinsing. Tap water contains minerals that create new buildup. Use distilled water throughout the entire cleaning process.
A thin flexible brush or pipe cleaner reaches inside narrow tubes. These tools remove hardened residue without damaging delicate water lines. Look for brushes small enough to fit through your machine’s internal passages.
A spray bottle helps you apply water forcefully into the fill area. This pressure clears pipes leading to the heating element. Fill it with your vinegar solution or plain water as needed.
Clean cloths or paper towels catch drips and wipe down surfaces. Have several on hand since you’ll use them throughout the process.
A bucket or large bowl catches water when you flush the system. This prevents mess on your countertop and lets you see what comes out.
A small cup or measuring container helps you pour solutions into the water tank. Accuracy matters when mixing your cleaning formula.
Your user manual is surprisingly helpful. It shows you exactly where water lines run inside your specific machine model. Different machines have different designs, so check before you start.
Finally, keep a towel nearby for spills. Vinegar solutions can stain, so protect your countertop and floors. Gather these supplies first, then you’re ready to begin the unclogging process safely.
Step-By-Step Guide to Unclogging the Water Line
Start by unplugging your coffee machine from the wall outlet. This keeps you safe during the entire unclogging process.
Remove the water tank and empty any remaining water. Rinse the tank thoroughly under running water to remove loose debris and sediment buildup.
Mix a cleaning solution using equal parts white vinegar and distilled water. This ratio works best for breaking down mineral deposits without damaging your machine.
Pour the vinegar solution into the water tank until it’s about three quarters full. Place an empty carafe under the brew basket to catch liquid.
Turn on your machine and let it run for about 30 seconds. This allows the solution to flow through the water lines.
Stop the brew cycle and let the machine sit for 15 to 20 minutes. The vinegar needs time to dissolve stubborn mineral buildup inside the tubes.
Resume the brewing process and let it complete fully. Repeat this cycle two more times using the same vinegar solution.
After the third cycle, empty the carafe and refill the tank with distilled water only. Run two complete brew cycles with plain water to rinse away all vinegar residue.
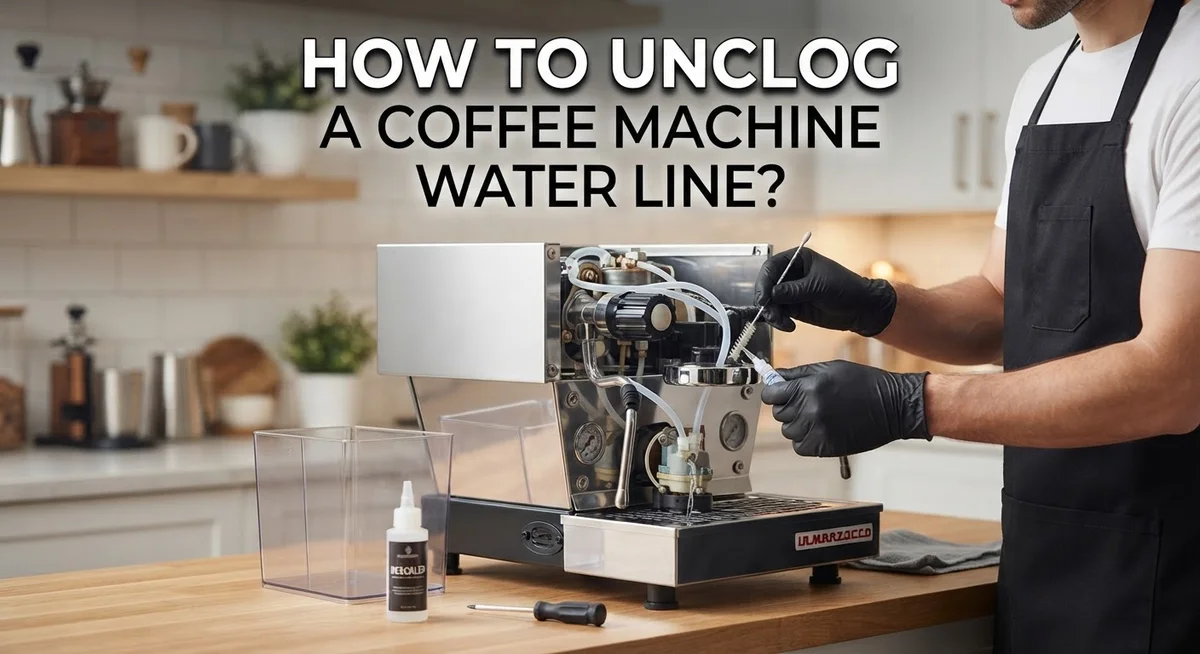
For visible blockages in tubes, use a thin flexible brush or pipe cleaner. Gently insert it into the fill area and any accessible openings to dislodge hardened deposits.
Spray forcefully into the fill area with distilled water using a spray bottle. This pushes out loosened debris from pipes leading to your heating element.
Reassemble all parts once everything is clean and dry. Run one final cycle with distilled water before brewing your next cup of coffee.
How to Clear Stubborn Blockages in Down Pipes
When stubborn blockages resist your initial unclogging efforts, you need a more aggressive approach. These tough clogs form when mineral deposits harden inside your down pipes over time.
Start by inspecting the tubes visually. Look for white, brown, or greenish crusty buildup inside the water lines. This visible debris tells you exactly where the problem sits. Use a thin flexible brush or pipe cleaner to gently probe inside these tubes. Push slowly to avoid damaging the pipes.
For hardened residue that won’t budge, repeat your vinegar solution cycles. Run the machine through multiple brew cycles using your 50/50 vinegar and distilled water mixture. Each cycle helps dissolve stubborn mineral layers. Let the machine sit for 20 to 30 minutes between cycles to allow the vinegar time to work.
Try forcefully spraying water into the fill area with a spray bottle. Direct the water stream into the tank opening where water enters the machine. This pressure helps dislodge particles stuck deeper in the pipes leading to your heating element.
Never use harsh chemicals like bleach or ammonia. These damage internal components and leave toxic residue in your coffee. Avoid abrasive scrubbing tools on water contact parts as well.
If blockages still persist after several vinegar cycles and brushing attempts, the clog may sit in areas you cannot easily reach. Consider consulting your user manual for guidance on accessing internal tubes. Some machines allow you to remove specific components for deeper cleaning.
Regular maintenance prevents these stubborn blockages from forming. Clean your water tank and tubes weekly to stop biofilm and mineral buildup before they harden into impossible clogs.
Tips for Preventing Future Clogs and Biofilm Buildup
Regular maintenance stops clogs before they start. The key is cleaning your water tank and internal tubes frequently.
Empty and rinse your water tank at least once a week. Biofilm grows quickly in standing water, so don’t let water sit inside the machine between uses. Wipe the tank dry before refilling it with fresh water.
Run a vinegar cleaning cycle every month, even if your coffee tastes fine. This prevents mineral buildup from hardening inside the tubes. Use the same equal parts vinegar and distilled water solution, but only do one or two cycles instead of the full unclogging process.
Pay attention to your water source. Hard water contains more minerals that create clogs. If your tap water is very hard, consider using distilled water for brewing. This simple switch reduces deposits forming inside your machine over time.
Check the water inlet area where water enters the machine. Remove any visible debris or mineral flakes you see there. A quick inspection takes just seconds but catches problems early.
Don’t ignore slow brewing. When your coffee drips slower than usual, that’s your warning sign. A slow brew often means minerals are starting to block the water line. Run a vinegar cycle immediately instead of waiting for a complete clog to develop.
After each use, leave the machine unplugged for a few minutes. This lets any remaining water drain from the tubes naturally. Moisture trapped inside tubes encourages biofilm growth.
Consistency matters most. Small weekly cleanings beat emergency unclogging sessions. You’ll enjoy better tasting coffee and fewer machine problems when you stay ahead of buildup.
Common Mistakes to Avoid When Cleaning Water Lines
Many people make simple mistakes when cleaning their coffee machine water lines. These errors can damage your machine or make clogs worse instead of better.
Using harsh chemicals is the biggest mistake. Bleach, ammonia, oven cleaner, and heavy degreasers eat away at rubber seals and plastic parts inside your machine. These chemicals also leave toxic residue that contaminates your coffee. Stick with white vinegar and water only. This gentle solution works effectively without harming your equipment.
Abrasive scrubbing tools cause real damage to water contact surfaces. Don’t use steel wool, rough sponges, or hard brushes on internal tubes and components. These tools scratch protective coatings and create tiny cracks where bacteria grows. Use only soft brushes or thin pipe cleaners designed for delicate work.
Skipping the unplugging step puts you at risk. Always unplug your machine before doing any manual cleaning. Water and electricity don’t mix. Even with the machine off, standing water inside can conduct electricity through wet hands and tools.
Another common error is rushing the cleaning process. People run one vinegar cycle and assume the job is done. Mineral buildup and biofilm need multiple cycles to dissolve completely. Give your machine time to soak between cycles.
Ignoring water quality matters too. If your tap water is very hard, vinegar cleaning alone won’t prevent future clogs. Hard water minerals accumulate faster in machines that don’t get regular maintenance attention.
Finally, don’t forget about the water tank itself. A dirty tank spreads bacteria through your entire system. Clean it weekly even when you’re not running a full descaling cycle. These small habits prevent expensive repairs and keep your coffee tasting fresh.
Troubleshooting: When Unclogging Doesn’t Fix the Flow
Sometimes your coffee machine still won’t brew properly even after you’ve tried unclogging it. This frustrating situation tells you the problem goes deeper than a simple blockage.
The clog might be hiding in areas you cannot reach easily. Water lines run through multiple chambers inside your machine. These hidden passages can trap mineral deposits where your brush cannot go. The heating element chamber is a common culprit. Hard water minerals accumulate there over months and months.
You should try a different approach. Run several vinegar cleaning cycles back to back. Use a 50% vinegar and water solution. Let each cycle sit for 15 minutes before running the next one. This gives the acidic vinegar time to dissolve stubborn mineral buildup from the inside.
If vinegar cycles fail, your machine may have internal damage. Cracks or leaks in tubes prevent water from flowing correctly. These problems require professional service. Attempting to fix internal damage yourself can make things worse.
Water quality matters too. If you use hard tap water consistently, minerals build up faster than cleaning can remove them. Switch to distilled water for brewing. This simple change reduces future clog formation significantly.
Sometimes the issue isn’t the water line at all. Your heating element might be failing. Your pump could be broken. These components need professional diagnosis.
Before giving up, check one more thing. Inspect where water enters your machine. This inlet area sometimes gets overlooked during cleaning. Remove any visible debris there. If nothing works after these steps, your machine needs expert attention. Regular maintenance prevents most of these stubborn situations from happening in the first place.
Final Thoughts
A clogged coffee machine water line does not mean your machine is done for. Most clogs come from mineral buildup and biofilm that forms over time. With the right approach, you can clear this blockage yourself at home.
The vinegar solution remains your best friend here. A simple mix of water and white vinegar breaks down mineral deposits without harming your machine’s internal parts.
Patience makes a real difference during this process. Some clogs clear after one cycle. Others need several rounds of cleaning before water flows freely again.
Always remember to unplug your machine first. This simple step protects you and the appliance during cleaning.
Your brush or pipe cleaner tool helps reach spots that vinegar alone cannot fix. Gentle, steady pressure works better than force when clearing tubes.
Think of this cleaning process as basic maintenance, not a punishment. Coffee machines need care just like any other appliance you use daily.
Regular attention prevents most clogs from forming in the first place. A few minutes of cleaning each week saves you from bigger headaches later.
If you follow these steps and still face problems, that tells you something important. Your machine might need professional help or replacement parts.
Trust your instincts about your equipment. You know how your machine normally performs and brews.
A well maintained coffee machine rewards you with better tasting coffee. Clean water lines mean pure flavor without any mineral or metallic taste affecting your cup.
Take these lessons forward with your daily routine. Small consistent efforts keep your machine running smoothly for years to come.
Your morning coffee ritual deserves this small investment of time and care.
Frequently Asked Questions
What causes water lines to clog in coffee machines?
Mineral buildup is the main culprit. Hard water deposits accumulate inside your tubes over time. Biofilm also grows in water tanks when they sit unused. Hardened residue from old coffee oils can stick to pipe walls too. These three things work together to slow or stop water flow.
Can I use vinegar to fix a clogged water line?
Yes, vinegar works very well. Mix white vinegar and water at a 50/50 ratio. Run this solution through your machine like you would normal water. The acid breaks down mineral deposits safely. Let the solution sit in the lines for 15 to 20 minutes before running it through again.
What tools help clear stubborn clogs?
A thin flexible brush or pipe cleaner reaches inside narrow tubes. You can gently push it through to grab hardened debris. Forcefully spray water into the fill area to blast out loose particles. These manual methods work best after you’ve used vinegar to soften the buildup.
How often should I clean my coffee machine water lines?
Regular cleaning prevents most clogs from forming. Clean your water tank every week during normal use. Deep cleaning with vinegar should happen monthly for machines in hard water areas. Machines in soft water areas can go longer between cleanings. Consistency matters most to keep everything flowing smoothly.
What shouldn’t I use to clean water lines?
Never use bleach, ammonia, oven cleaner, or heavy degreasers. These harsh chemicals damage rubber seals and plastic parts. Don’t scrub aggressively with abrasive tools on water contact surfaces. Stick with vinegar and soft brushes for safe, effective results.

Hi, I’m Emma Lee — the coffee-obsessed creator behind Morning Drip Vault. I spend my days testing coffee machines, exploring brewing techniques, and reviewing the latest coffee gear. My mission is simple: helping you find the perfect machine to brew your best cup, every single morning.