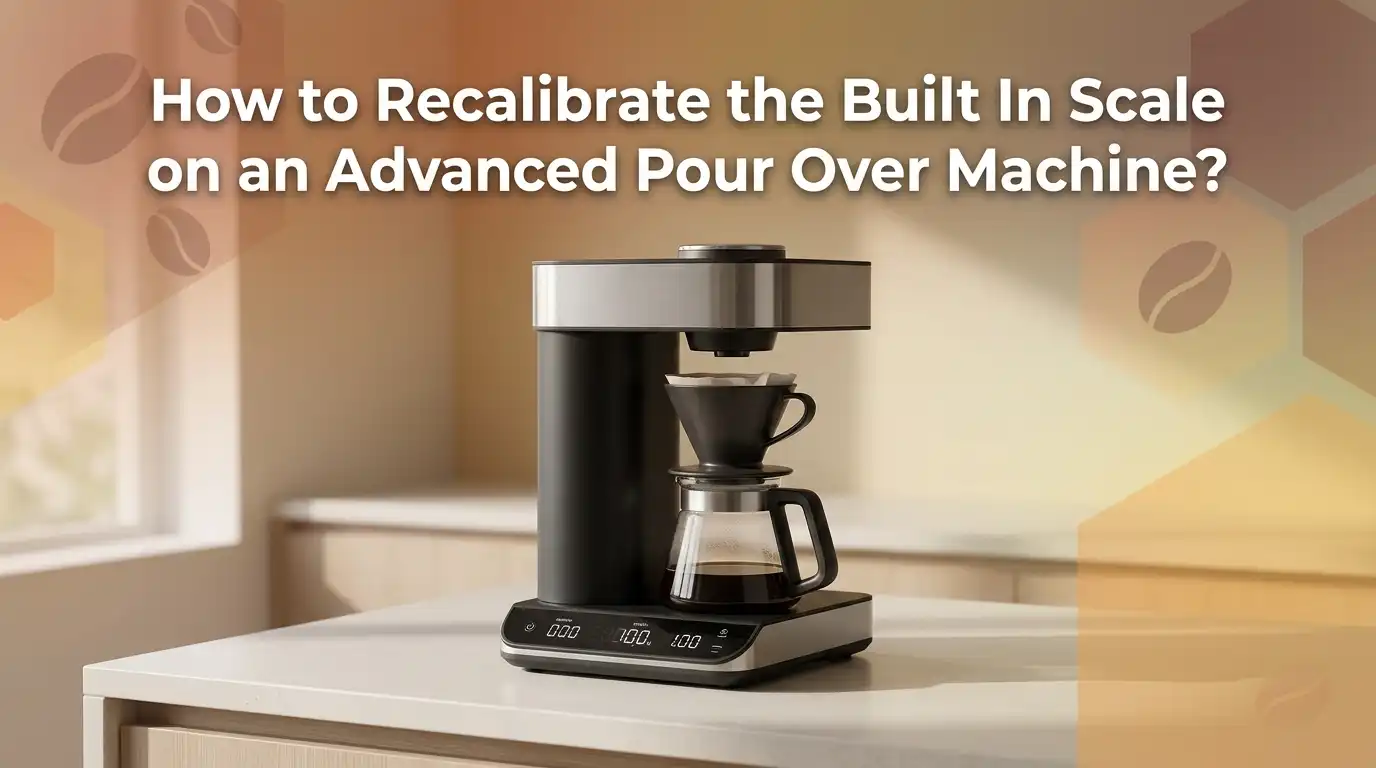
How to Recalibrate the Built In Scale on an Advanced Pour Over Machine?
A built in scale can make pour over coffee feel easy. You add your beans, set your cup, and trust the machine to read every gram.
But once that scale starts drifting, showing odd jumps, or missing the real weight, the whole brew can fall apart fast. Your ratio changes. Your taste shifts. Your confidence drops.
The good news is that most scale errors do have a fix. In many cases, the answer is not a full repair. It is a careful reset, a clean surface, a true zero point, or a proper calibration routine.
In a Nutshell
- Start with the easy fixes first. A built in scale can act wrong because of a dirty drip tray, a tilted counter, old protective film, vibration, or a weak power setup. Do those checks before you assume the sensor is bad. This saves time and keeps you from changing settings that were not the real problem.
- Use the machine menu if your brewer offers scale calibration. Some advanced pour over machines include a scale module and an on screen routine. A common process is simple. The machine asks for an empty platform first, then a 100 gram weight, then a 500 gram weight. If your screen says retry, repeat the process with steady placement and a clean base.
- Use known weights, not guesses. A scale cannot recalibrate well if the test weight is wrong. A proper calibration weight is always the best choice. If you do not own one, use a trusted reference scale to confirm the weight of an object before you place it on the brewer.
- Watch for overload and drift. Many built in coffee scales have a clear weight limit. If you place a heavy server, mug, dripper, and water together, you may push the scale too far. That can trigger an overload message or leave the readings unstable. Keep the total load within the machine limit and never leave heavy items sitting on the scale for long periods.
- Firmware and power matter more than many people think. Some machines improve maintenance functions and sensor stability through updates. A direct wall outlet can also help. A shared power strip can cause unstable readings on some machines. If your empty scale still moves on its own, do a restart, update the firmware, and test again.
- Know when to stop and ask for support. If the scale keeps climbing with nothing on it, fails calibration again and again, or reads a known weight wrong after a full reset, you may be dealing with a damaged load cell or internal issue. That is the moment to stop home fixes and contact the maker for service.
Know what recalibration can and cannot fix
Recalibration helps when the scale reads the wrong number even though the sensor still works. It corrects the machine’s reference point. That is useful if your brewer shows a small offset, drifts after moving it, or fails to match a known weight.
Recalibration does not fix everything. It will not repair a bent platform, water damage, a crushed load cell, or a machine that was squeezed or dropped. If the display flickers, freezes, or shows major jumps, the problem may be deeper.
Think of calibration as a software level correction for a hardware part. It is powerful, but it has limits. Pros: fast, low risk, and often enough for normal drift. Cons: it can hide a bigger fault for one or two brews, then the error comes back. That is why you should test the result after every calibration.
Spot the signs that your built in scale is off
A bad scale usually gives you clues before it fully fails. The most common sign is a drifting zero. You remove everything, but the display still sits above or below zero. That is your first warning.
Another sign is mismatch. You place the same empty cup on the machine three times and get three different numbers. Or your brewer says you added 18 grams of coffee, but a second scale says 20 grams. That gap matters because pour over recipes depend on small changes.
Watch for error messages too. Overload alerts, unstable readings, or sudden jumps while the platform is empty all point to a scale issue. Pros of early detection: easier fix, better brew consistency, less stress. Cons of ignoring it: weak coffee one day, harsh coffee the next, and a lot of wasted beans while you try to guess what changed.
Gather the right tools before you touch the settings
Before you open menus and press buttons, get your setup ready. You need a clean cloth, a dry brush, a flat counter, and ideally 100 gram and 500 gram calibration weights if your machine asks for them. This part is simple, but it matters.
If you do not have official weights, use a trusted reference scale to verify another object first. The key is certainty. A wrong test weight gives you a wrong calibration. You should also have your machine manual or support guide open if your model has brand specific steps.
Keep the platform empty and dry before you start. Remove the cup, dripper, carafe, and loose grounds. Pros of good prep: faster process, fewer failed attempts, cleaner results. Cons of poor prep: the machine may say retry, the reading may stay unstable, and you may think the sensor is bad when the real problem was poor setup.
Start with a soft reset and a true zero point
The first fix should be the least invasive one. Turn the machine off, unplug it if the maker allows that, wait about thirty seconds, and turn it back on. Then leave the scale empty for a moment so it can settle. This often clears minor sensor confusion.
Next, let the brewer reach room conditions. If the machine was just moved from a cool room to a warm kitchen, give it a few minutes. Load cells can react to temperature shifts. That small pause can stop tiny drift before it turns into a false problem.
If your machine has a tare or zero function, use it with nothing on the scale. Then place and remove the same cup two or three times. Pros: quick, safe, no tools needed. Cons: it only fixes surface level errors. If the scale is still moving while empty, you need a deeper step.
Clean the scale area and remove anything that touches the platform
A built in scale can fail because it is not moving freely. Coffee grounds, dried drips, sticky syrup, or a misaligned drip tray can press against the weighing area. That tiny contact can change the reading.
Use a soft brush to clear loose grounds. Wipe the platform and the edges with a slightly damp cloth, then dry it fully. Do not flood the area with water. You want the surface clean, not soaked. Look underneath any tray piece that sits over the sensor path.
Some users forget the original protective film or tape that ships with new machines. If that film is still attached, it can cause unstable empty readings. Pros of cleaning: cheap, easy, often effective. Cons: it can feel too simple, so people skip it. Do not skip it. A clean load path is one of the most common fixes for false weight readings.
Put the machine on a flat surface and cut outside interference
A digital scale needs a stable base. If your machine sits on a tilted counter, a soft mat, or a shaky cart, the reading can look steady but still be wrong. Flat and firm is the rule.
Use the same spot every time if possible. If the counter feels uneven, place a rigid board on the most stable section and test there. Keep the machine away from strong air flow, nearby vibration, and heavy foot traffic. Even small movement can confuse a sensitive coffee scale.
Power can matter too. Some official support guides warn against shared power strips because other ungrounded devices may affect scale stability. A direct wall outlet is the safer choice. Pros: strong improvement without opening settings. Cons: if your kitchen layout is fixed, this step can be annoying. Still, it is worth testing before you blame the sensor.
Run the built in calibration mode the right way
If your machine includes a scale calibration feature, now is the time to use it. Many advanced models hide this inside a scale menu or advanced settings page. Follow your exact model steps because button timing can vary.
One official pattern is clear and easy to understand. First, open the scale module. Then start calibration. The machine asks you to confirm the platform is empty. After that, it asks for a 100 gram weight in the center. Then it asks for a 500 gram weight in the center. If the screen says done, you are finished. If it says retry, repeat with cleaner placement.
Do not rush this step. Place the weights gently and keep them centered. Pros: most accurate home fix, direct correction of the sensor reference. Cons: you need proper weights, steady hands, and the machine must actually offer this feature.
Use a 100 gram and 500 gram test to confirm accuracy
A completed calibration is not the end. You still need proof that it worked. Start with the same weights you used during the routine. Place the 100 gram weight on the center of the scale, remove it, and repeat three times. Then do the same with 500 grams.
The result should be stable. You want the machine to return the same number each time, or stay very close to it. Repeatability is just as important as raw accuracy. A scale that shows 100.0, then 99.2, then 100.8 is still a problem even if one reading looked correct.
You can also test the empty platform after each check. It should come back to zero cleanly. Pros of this method: clear pass or fail result, easy to document for support. Cons: it takes a few extra minutes, and some users stop too soon after the calibration screen says done.
Cross check with a water test before your next brew
A dry weight test is great, but a brew style test is even better. Fill a known container with water and compare the number on your machine with the number on a trusted second scale. Since 1 milliliter of water is about 1 gram, this is an easy real world check.
Do not turn this into a lab project. Keep it simple. Place the same vessel in the same position each time. Add water slowly. Watch whether the numbers rise smoothly or jump in chunks. A healthy scale should feel calm and predictable.
This test helps because some scales behave well with static weights but act strange during real brewing. Pros: practical, close to daily use, easy to understand. Cons: less exact than certified weights, and splashed water can create new errors if you do not dry the platform after testing.
Deal with drifting numbers after calibration
If the scale still drifts after a full calibration, do not repeat the same step five times in a row. Stop and inspect the basics again. Check the tray alignment. Check for trapped grounds. Check whether anything touches the scale body from the side or below. Mechanical pressure causes many false drifts.
Then look at how the empty scale behaves. If it moves by a tiny amount and settles, that may be normal. If it keeps climbing or falling with nothing on it, that points to interference or damage. Try a direct wall outlet. Move the machine to a firmer counter. Restart it once more.
Long term heavy loading can also hurt accuracy. Do not store a heavy dripper or server on the scale. Pros of this slow troubleshooting method: you isolate the real cause. Cons: it takes patience, and the answer may still be a service request.
Update firmware and restart the machine if readings still look wrong
Smart brewers are part hardware and part software. That means a scale problem can sometimes improve after a firmware update. Some makers add new maintenance tools, sensor checks, or stability fixes through updates. It is a simple step with real value.
Open the companion app or settings menu and confirm that the machine runs the latest version. Then restart the machine after the update. If your brewer includes maintenance routines, run those as well. A clean internal state can help sensor logic settle down.
Do not expect magic from software alone. Firmware will not fix a cracked load cell. But it can solve odd behavior caused by bugs, incomplete resets, or missing maintenance options. Pros: low effort, official path, useful for smart brewers. Cons: it depends on internet access, and it will not solve physical damage.
Know when to stop and ask for service
There is a point where home fixes stop being smart. If the scale fails calibration every time, cannot hold zero, or reads a known weight far off after careful testing, you may have a hardware fault. That is your sign to stop.
You should also seek support if the platform was squeezed during shipping, if the machine was dropped, or if water entered a part that should stay dry. Some makers even advise lifting the brewer by the sides rather than pressing on the built in scale. That warning exists for a reason.
Take notes before you contact support. Write down the error, the weight test results, and the steps you already tried. Pros of asking early: faster fix, better chance of warranty help. Cons: you may be without the machine for a while. Still, that is better than forcing a broken sensor to behave.
Prevent future scale errors with simple care
Once the scale is working again, keep it that way with a few habits. Wipe the area after every brew. Brush away grounds before they build up. Do not leave a heavy carafe sitting on the scale between cups. Small care beats repeated recalibration.
Keep the brewer in one stable spot. Use a direct wall outlet if your machine is sensitive. If the maker offers a calibration routine, test the scale from time to time with a known weight instead of waiting for a major error. A short check is easier than a full troubleshooting session.
If you ever move the machine, lift it from the body, not the scale area. Let it settle before brewing again. Pros of prevention: better accuracy, fewer ruined brews, longer sensor life. Cons: you need consistency and a little discipline. The payoff is worth it every morning.
FAQs
Can I recalibrate a built in coffee scale without calibration weights?
Sometimes you can check accuracy with a trusted second scale and a known object, but true recalibration works best with real weights. A 100 gram and 500 gram set is the safest option if your machine asks for those values. If you use an object with guessed weight, the machine may accept it and still end up wrong.
Why does my scale read zero, then change by itself?
That usually points to drift or interference. The cause may be a dirty tray, leftover protective film, vibration, an uneven counter, or unstable power. If the number keeps moving with nothing on the platform, clean the area, move the machine, use a direct outlet, and run calibration again.
How often should I recalibrate the built in scale?
There is no single rule for every machine. A good plan is to recalibrate after moving the brewer, after a noticeable error, or after any event that could affect the sensor. You can also do a quick check with a known weight every few weeks if you rely on the machine daily.
What if my machine has no visible scale calibration menu?
Some advanced brewers do not offer user side calibration. In that case, focus on zeroing, cleaning, leveling, firmware updates, and known weight checks. If accuracy still stays off, contact the maker. The scale may need a service level reset or part replacement.
Is it safe to keep using the machine if the scale is wrong?
Yes, but your brew recipe will suffer. Bean dose, water dose, and yield can all shift. That means flavor becomes less repeatable. If you need consistent coffee right away, use a separate external coffee scale until the built in one passes a proper test.

Hi, I’m Emma Lee — the coffee-obsessed creator behind Morning Drip Vault. I spend my days testing coffee machines, exploring brewing techniques, and reviewing the latest coffee gear. My mission is simple: helping you find the perfect machine to brew your best cup, every single morning.